
Most Eve players don't do this exploration stuff and regard it as some kind of mystical voodoo that allows veteran players to suddenly materialise on top of you when you thought you were safe in the middle of nowhere. So before you consider wormhole life you need to be able to say Yes to three questions:
1) Am I competent at the minigame?
2) Am I willing to enjoy or at least tolerate repeating this minigame over and over for as long as I live in w-space?
3) Do I have time to spend half an hour or more doing this before I move on to other activities during many of my play sessions (you can do some things in wormholes, ie anomalies, without exploring first but even that's not recommended).
For the first step, competence, do the in-game tutorial and watch the CCP youtube tutorial.
To make my next point I first have to clear up a myth. Exploration has changed several times in Eve and as a result some people cling to old-fashioned ideas that work very well for them but which are not actually rational. The myth is that certain amounts of probes less than your maximum work better. You'll see people claim that their 5 probe pattern is the best possible set up.
To disprove this myth we'll use set theory which is very similar to exploration. When doing exploration we want the point we are looking for to be inside as many bubbles as possible. Have a look at this Venn diagram:

You see the shaded area? How many circles is it inside? It's not a trick question, the answer is three. Now take a look at another example:

Now every time someone insists that their pattern of 5 probes works better than dropping your maximum (which is 8 with Astrometrics V) they are asserting one of two things:
1. That there is a point somewhere that is inside more circles when you have less circles out there for points to be inside. For example somewhere in diagram 2 there is a point that is inside more circles than the shaded area in diagram 1.
2. Or that trigonometry doesn't become more accurate the more vectors you have.
Let's consider that for a moment. Which way is Paris? Point to it. Now imagine we have someone in Capetown, someone in Tokyo and someone in London also pointing to Paris and we can take your vector with theirs and look at the cross section. Which is more accurate? It's evident that the more vectors we have pointing towards our target the more accurate we will be.
So never ever listen to someone who tells you that using 5 probes or seven or three works better than dropping your maximum. Always drop your maximum. (The only exception is if you are hunting people and you don't want them to see your probes and you don't want to spend the time dropping all 8 because you know roughly where they probably are. Even here rushing will sometimes produce worse results).
Next we'll talk about dimensions. I had an epiphany many months after I first started scanning. It sounds really obvious after the fact but it's this:
When plotting a point in three-dimensional space there's only three dimensions that matter.
What this translates to is control your probes by using the arrow keys only, don't click and drag the middle square. If you move the whole thing you can't see how you are moving it in 3 dimensions when you are using a 2 dimensional computer monitor. So drag the arrows so you get the probe cluster centred on the dot, then tilt the view 90 degrees and adjust up or down, tilt back and correct.
Let's take it from the top. Get to a safe, align to a celestial, launch all your probes (usually core, you can use combat with good skills), cloak.

Drag one probe upwards using the arrow. Drag one the same distance down.


Hit Analyze. See what you get.


Scan.

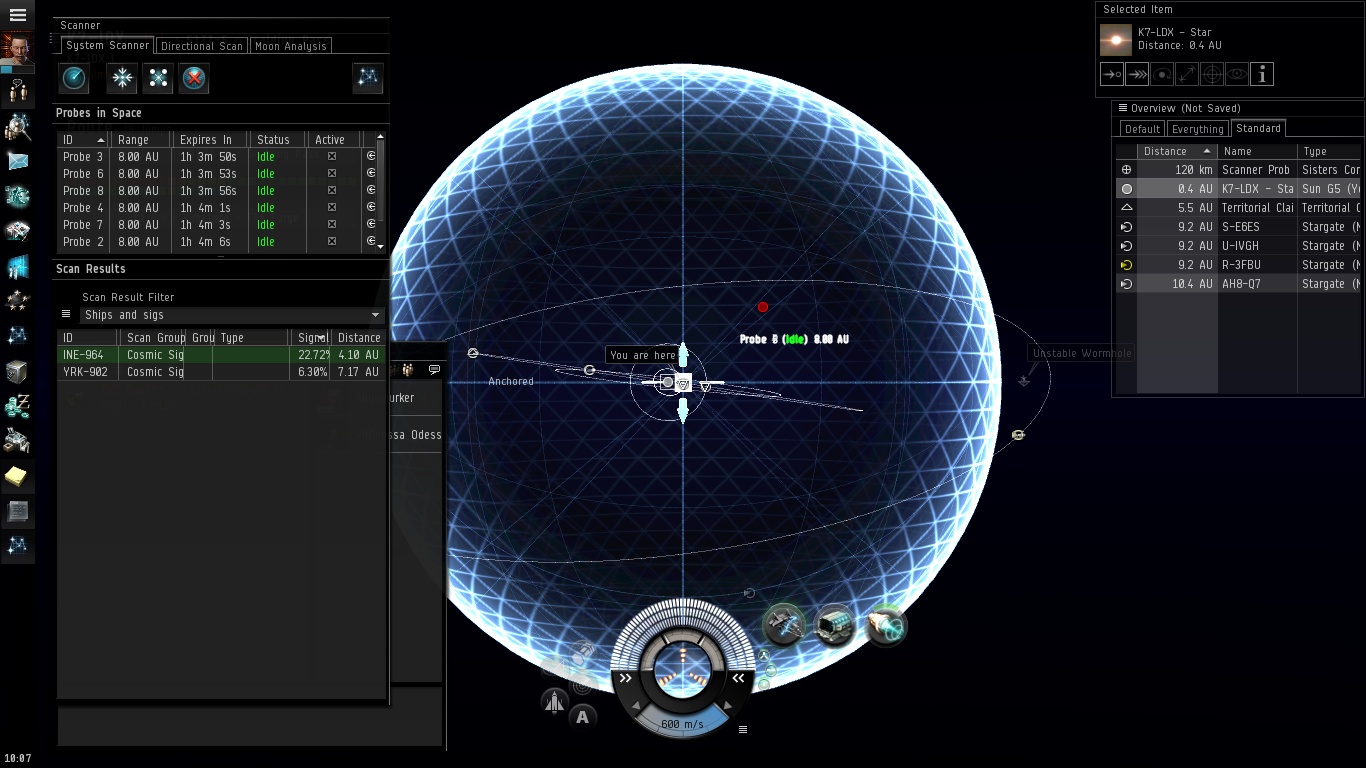
Scanning has given us a better location on the signature. You can see in the Scanner window that the INE-964 sig now has a signal strength of 38.92% meaning the dot is more accurately located in space. As we've passed the 25% threshhold, the Scanner window also now tells us what type of signature it is - Unknown. In Nullsec this means either a tough pve complex which is quite likely to escalate or a wormhole. In wormhole space Unknown is always a wormhole. You can see in this screenshot I've already collapsed my probes on the point in preparation for narrowing down my search. I've also resized the big blue balls. You do this by putting the mouse cursor on the edge of the blue ball until it turns into directional arrows, then shift dragging them in. I usually drop 2 sizes at a time but that's with fairly good skills (all Vs, no implants). So I've dropped from 8 AU to 2 AU. Try that but if you find that when you condense down you lose the sig next time you hit Analyze you'll need to limit yourself to one size decrease at a time (eg from 8 AU to 4 AU).
Note: if you have a filter on you will lose sigs suddenly as threshholds are passed. For instance if you check all the sig types except Grav then start scanning it will allow you to scan sigs down until they pass the 25% threshhold then realise it's a grav site and filter it. However you don't know this so all you know is that you condensed the big blue balls and the sig stopped showing up - you think you've lost it and expand outwards looking for it. You can waste a lot of time doing this.
Always make filters that include the whole group, never cherry pick within groups when making Scanner window filters.


Now go and try it! There's no final screenshot of a wormhole with 100% sig strength because you have to go and get that for yourself!
To be fair, moving a probe by one of the boxes actually only moves it in two dimensions, which we are quite capable of perceiving on a two-dimensional display.
ReplyDeleteRather than move the probe up using one arrow, across using another, and across again using a third, it can be beneficial to move the probe in two dimensions simultaneously using the box, before changing axis to check the third dimension has everything lined up.
I would recommend lining up the z- or vertical-axis first, then aligning the horizontal axes. Because the viewpoint isn't allowed to reach 90 degrees vertically, some parallax error is always introduced in the vertical axis when moving probes.
You can shift-click move the probes in two dimensions on to the signature whilst rotated down to the horizontal, moving them in the vertical and one horizontal axis at the same time. Then rotate to the overhead(ish) view and move the box again, to align the probes to the signature in the two horizontal axes. This will have the signature centred in the probes after only two moves instead of three.
OK, I'll try that, thanks.
DeleteTo continue what pjharvey is saying, what I normally do is position my camera above the ecliptic looking straight down and position all my probes (7 atm) in a heptagon on a single horizontal plane. When I get a hit, I swing the camera down to position my ring of probes on the same level, and then back up to the top to position that ring around the pinpoint and collapse or expand as necessary. It might not be quite as triginometrically accurate to put them all in a plane like that, but I never have to worry about one of mine being 40 AU below the rest and not noticing because of my camera angle.
DeleteI don't move single probes at all after creating my initial diamond shape. I create my diamond then expand/collapse that around the system.
DeleteYeah, alt-drag's introduction made it so that once you have an initial configuration of probes you never have to move them singly again. Alt-drag and shift-drag all the way, baby.
DeleteStabs, pjharvey - thanks for the tips. Over the weekend I gritted my teeth, "resized my balls and re-positioned them", and now I'm getting some results. Now I just need to figure out how to run them before solo's in T2's run in and clear them out.
ReplyDeleteIs there anyway to determine the likelihood of Magnetometrics and Radar sites appearing in Empire? I haven't seen a single one?
You probably need to be in a quieter corner of space. In busy systems near Jita/Amarr sites get found and hoovered faster.
DeleteTry somewhere like Khanid or the far end of Minnie space.
Mags and Radar sites are rare but lucrative. It's also reasonably safe to explore low sec in a cov ops or T1 frigate.